What happens now?…
Roasted Cranberry Pork Loin
I was asked to make a Mother’s Day Luncheon by a friend of mine. The menu included Artichoke Olive Macaroni Pie, Roasted Pork Loin, Three Bean Salad, Artichoke Loaf and Lemon Squares. I only remembered to take a photo of the Roasted Pork Loin…so that’s the recipe I’ll share with you today.
You will need:
One 2.5 lb pork loin
1/2 cup fresh sage
1/2 cup fresh basil
1/2 cup fresh rosemary
1/4 cup fresh oregano
1/3 cup fresh thyme
1/3 cup extra virgin olive oil
a pinch of coarse sea salt
1/2 tsp whole peppercorns
1.5 cups of cranberries
Butcher’s twine or Silicon bands
1/2 cup apricot jam (homemade if you have it)
Here we go:
Process all your fresh herbs, sea salt and peppercorns in a food processor till it’s almost like a paste. Set aside.
Preheat oven at 375 degrees F.
Butterfly your pork loin. If you use the following method, you will have 25 percent
more length to the meat roll than if it were simply butterflied across the center width.
Positioning your sharp knife about 3⁄4” from the edge, make a lengthwise cut two-thirds of the way down. Fold back the cut edge. Slice horizontally until you are about 3 ⁄4” from the other edge. Fold the flap open like a book. Slice the flap horizontally until you are about 3⁄4” from the other edge. Fold the flap open like a book.
Place a sheet of saran wrap on the table. Place the butterflied pork loin on top, cover with another piece of saran wrap. Using either a kitchen mallet or a rolling pin pound the pork loin till flattened and about 1/2 inch thick.
Remove the top saran wrap and discard.
Using three quarters of the herb rub, massage the herbs into the meat on both sides. Add the cranberries on top of the meat. Use enough to cover the meat.
Taking one edge of the meat, roll it into a tight roll. Yes, it is okay that some of the cranberries are falling out :). Curl and tuck in the ends so that it cooks at the same rate as the rest of the loin.
Using either the butcher’s twine or the silicone bands, secure the rolled stuffed pork loin. I used silicone bands as it’s reusable. And if you’re not used to tying meat, silicone bands are a god-send. Start at one end and work your way down to the other end of the loin. If you’re using butcher’s twine, please note that there is no standard butcher’s knot. A knot is a knot once it holds as far as I’m concerned…but I think that’s why they don’t let me secure the boats 🙂 But that’s another story… The easiest way for me to explain meat tying is to go to this website: http://www.cooksillustrated.com/images/document/…/JF98_IStiemeat.pdf
Like I said…silicone bands are the way to go 🙂
Place the tied pork loin in a baking dish. Pour the olive oil over it. Massage the remaining quarter of left over herb rub over the top and sides of the loin. Cover with foil. Place in oven and roast for 1 hour or until your meat thermometer reads 150 degrees internal temperature.
Turn off oven and remove pork loin from oven. You will have anywhere from 1 cup to 2 cups of liquid in your baking dish. Reserve about 1/2 cup of the pan drippings for your apricot jus. Cover pork loin and return to the turned off oven to stay warm.
In a heated small skillet or heavy bottom pan, combine the apricot jam and the reserved pork pan drippings. Reduce till the jus coats the back of a spoon.
Remove pork from oven and pan. Either remove the silicone bands or cut the butcher’s twine. Slice pork loin in 1 inch slices (or 1/2 inch slices if you prefer). You should get 12 slices.
Serve two slices per meal. Spoon some of the apricot jus over the top. Serve with your favorite starch or vegetable. I recommend either sweet potatoes and green beans for the heavy meals or a simple garden salad for the light meals.
Here’s a picture of the sliced pork loin without the apricot jus.
Enjoy!
Pork! Pork! Get your Pork Belly!
Hsiao-Chang Chou ( Seattle P-I Food Editor) once said: ” If you want to get a chef all hot and bothered, whisper “pork belly” in her ear.” No truer words have ever been spoken! When done right, pork belly will simply melt in the warmth of your mouth. Forcing you to close your eyes and sigh with pure satisfaction as the aroma embraces your nostrils and the flavors perform a mini carnival with your taste buds. Leaving you longing for more.
Some of you might be arching your eyebrows at the word pork “BELLY?!?”…but the fact is, unless you’re vegetarian, you would have consumed this fabulous portion of the pig time and time again. Loving it by it’s more common form: Bacon!…Basically thinly sliced cured pork belly.
The belly, a fattier meat, can be used for steaks, diced stir-fry meat or even for tacos. Belly pork may be rolled for roasting or cut for streaky bacon. It is also a common commodity trading item. Pork Belly is very popular in Chinese (Sweet and Sour Pork) and Korean (Samgyeopsal) cuisine. In Western cuisine, especially at high end restaurants, uncured whole pork belly has more recently become a popular dish. This is the version we’re going to tackle but with a West Indian twist.
I should warn you, this is a lengthy 3 to 4 day process. And unless you have all the high tech sous vide gadgets to make it go faster…this should be a labor of love.
Here we go:
You will need:
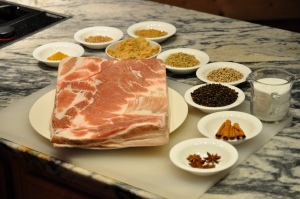
– 1/2 a pork belly (approximately 5 to 6 lbs)
– 2 1/5 cups of curing mix (See ingredients below)
– 10 cups of low sodium chicken stock ( this will vary depending on the size of the pork belly…you basically want enough to cover the belly while cooking. If you don’t have chicken stock, water will suffice)
Curing Mix:
 1/3 cup rough chopped Spanish Thyme (aka Cuban Oregano or Indian Borage. See picture. If you can’t find it substitute with 1/4 cup regular thyme, leaves and stems)
- 1/4 cup fennel seeds
- 1/4 cup cumin seeds
- 3 tablespoons coriander seeds
- 9 teaspoons black peppercorns
- 6 pieces star anise
- 4 pieces cinnamon stick
- 3 teaspoons white peppercorns
- 1 cup salt
- 2/3 cup sugar
In a coffee grinder, food processor or mortar and pestle, grind the thyme, fennel seeds, cumin seeds, coriander seeds, black peppercorns, star anise, cinnamon stick and white peppercorns. ( If you don’t want your coffee tasting like the spice rub for a few weeks..I suggest using the food processor or the mortar and pestle). Transfer to a bowl and stir in the sugar and salt.
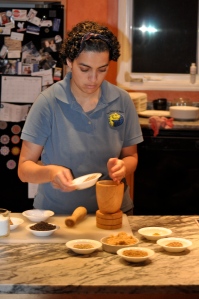
 Rub the pork belly with the dry cure. I prefer to massage the rub on the belly to really work it into the meat. Remember it’s a labor of love…
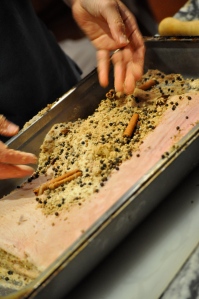

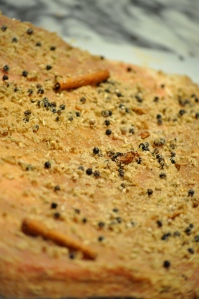 Place belly in a baking dish or pan large enough to hold it. Cover dish with saran wrap. You can also vacuum seal it or use a large enough ziploc bag, removing all the air from it. Even though we didn’t use this method, I highly recommend it as it truly seals in the flavor.
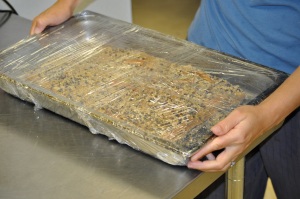 Refrigerate for 3 days. YES! 3 DAYS! You can go about your life thinking about the festival of flavors marinating that pork belly for 3 glorious days 🙂
3 DAYS LATER…. remove from fridge. Your pan or ziploc bag should have liquid in it. This is simply the natural juices of the meat extracted because of the sugar and salt.
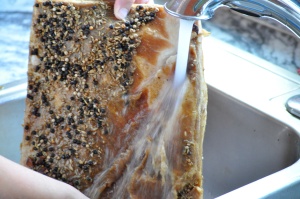
 Rinse the pork belly and place fat side on top in a casserole pan as close to the size of the belly as possible. (I know the pictures are fat side down…but I was eager to get it going. If you do forget to put it in fat side up…No problems. About half way through the cooking time (about 5 to 6 hours) remove from oven and flip the belly over in the pan. Cover and continue cooking for the balance of the time. (4 to 5 hours).
Preheat the oven to 275°F.
Cover belly with rich chicken stock (and/or water. If using water, you can add a mirepoix of diced onions, carrots and celery to it for added flavor) and cover pan.


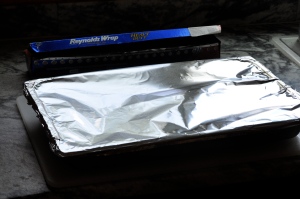 Place in oven and cook overnight, about 10 hours.
 Remove belly from braising liquid, drain. Reserve liquid.

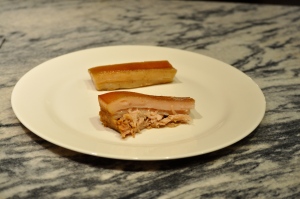
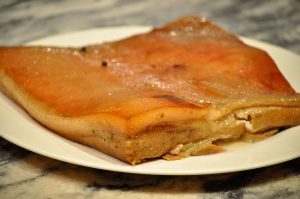 Cut into several serving pieces. Because of the fatty content, I suggest amuse bouche (bite size) portions or 2 by 1 inch pieces. I also suggest using a SHARP knife. Because the meat is so tender and should be falling off when touched, a sharp knife goes a long way. Another option is to chill the belly, as this will help to firm it up. I’ve included a picture of what the cut meat should and should not look like. the front piece was cut with a dull knife.
 Now the fun part! Searing the belly. You will need 2 tablespoons of honey and 1 cup of the reserved liquid.
 Pour reserved liquid and honey into a sauce pan or cast iron pot.
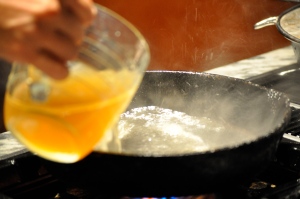
 Add each piece of belly to the sauce while cooking. Just enough to get a little more color ( a few seconds). Transfer each piece to a hot pan to sear. Cook down sauce till a nice dark red caramel color.
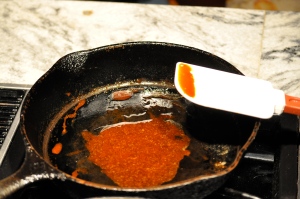 Sear the pieces of belly in a smoking hot pan. The fat from the belly will provide sufficient lubrication on the pan to not stick. Sear till golden brown. Turning each piece on each side once.

 Serve about two pieces per person. Spoon a little sauce on top and around plate. Garnish with either thyme, rosemary or baby arugula or mache leaves.
 To serve as an Entree, add mashed sweet potatoes and haricort verts. Bon Appetit!
Photo Droolings!
Here are some photos for you to drool over…
 This was Cassidy’s first birthday cake. Given her age, her mom wanted something she could eat without worrying about possible toxins entering her first born’s body. So we made a Chocolate Vegan Cake: wheat free, dairy free, egg free, gluten free, sugar free, organic chocolate cake. For all you Trinis reading this…the base flour was garbanzo-fava bean flour…AKA Channa flour 🙂 Despite all the “free” non-ingredients, it was a pretty darn tasty cake. The guests apparently went back for thirds! Oh the toppings are Agave glazed Strawberries and Coconut.
 The now famous Honey Cake! This was Evita’s and Michael’s handfasting cake. Handfasting is the term used for a Wiccan Wedding. The honey cake is a traditional handfasting cake. The one ingredient I never thought about using in a cake: Basil! It produced a wonderful depth of flavor to it without you being able to put your finger on what the taste was coming from. The bride and groom bees were made out of fondant. The happy couple appreciated the witch’s hats on each. The cake board, by the way, was made by the groom…Michael. He has since made every single cake board for me. The cake has also been featured in Weddings Galore and Off Beat Bride.
 Patrick Anderson’s Groom’s Cake: June 27th. 2009 at Old Wide Awake Plantation, SC. Patrick is a huge Super Mario Fan. He requested a Super Luigi Cake. It’s a Red Velvet cake with Cream Cheese Frosting. He had no clue that his bride, Michelle, had requested this for him. He was totally psyched when he saw it and even more estatic when he realized it was Red Velvet. He kept all the figurines, some were made from fondant and others were key chain figurines. The Stars on the front of the cake are breath mints.
 One of the Handfasting menu items: Shamrock Bites! These wonderful treats are simply Mac N Cheese reborn! It’s a Feta, Crab Mac n Cheese cut into bite size pieces. We baked them in Panko crumbs. Brushed our honey mustard sauce on top and garnished with four leaf clovers. The little dishes we got from Rosseto: http://www.rosseto.com
 My first Artisan Bread. We made a Rosemary Lemon Zest Olive Bread. It’s been one of my most requested Artisan breads. In the background are baguettes of Rosemary Olive bread and Artichoke bread.
Go Forth Eat Duck!
What better way to enter the world of blogging than with my favorite guaranteed to lick your plate clean recipe! My only other experience with duck was Curried Duck and Buss up Shot on beach “limes” or at family gatherings at Granny Rosie’s house. But that’s another story…
Even though I’ve made this recipe a few times, each time with plate licking involved…I think it’s time I shared it with you. I hope you enjoy it as much as I do…
You will need:
- 5 teaspoons (packed) fresh lavender blossoms or 2 teaspoons dried
- 2 tablespoon fresh thyme leaves
- 1 1/2 teaspoons coarse sea salt
- 1/4 teaspoon black peppercorns
- 1 6- to 6 1/2-pound duck, fresh or frozen, thawed
- 1 cup low-salt chicken broth (I use homemade chicken broth when I have it)
- 1 cup dry red wine (doesn’t matter what kind or brand…I usually go with leftovers from dinner parties or whatever favorite red wine you like)
- 1/4 cup honey ( I prefer whatever local honey is available in your area. I have access to three different bee-keepers in my area, so no shortage of great tasting honey).
- 4 baguette slices
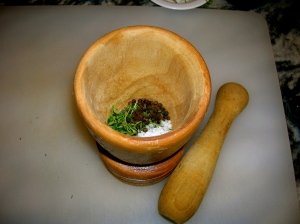
Preheat oven to 350°F. Finely grind 2 teaspoons fresh or 1 teaspoon dried lavender blossoms, thyme, sea salt and peppercorns in spice grinder, coffee grinder or with mortar and pestle.
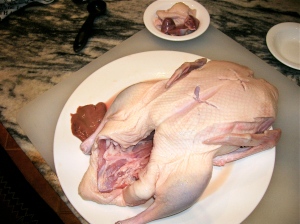
Remove fat deposits and giblets from duck cavity, reserving liver. Trim excess skin and fat from neck area. Rinse inside and out; pat dry.
Cutting through skin and fat (but not flesh) of duck breasts, score in crisscross pattern.
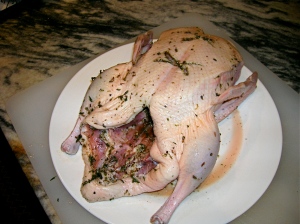
Rub inside and outside of duck with herb mixture; return duck liver to cavity.
Place duck, breast up, on rack in roasting pan.
Roast 2 hours. Remove from oven. Increase oven temperature to 375°F. Transfer duck to plate. Pour pan juices into 4-cup glass measuring cup; spoon off fat. Return juices and 1 tablespoon fat to pan. Add broth, 4 tablespoons of honey and wine.
Return duck to pan. Brush with 2 tablespoons honey.
Roast duck 20 minutes, basting once with pan juices. Brush with 2 tablespoons honey; sprinkle with 1 teaspoon fresh or 1/2 teaspoon dried lavender.
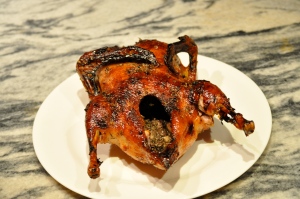
Roast duck until deep golden and thermometer inserted into innermost part of thigh registers 180°F, about 5 minutes longer.
Transfer duck to platter.
Remove liver; mash finely in small bowl.
Spread liver over baguette slices.
Add 1 teaspoon fresh or 1/2 teaspoon dried lavender to roasting pan. Place over medium heat. Boil juices until thick enough to coat spoon, whisking often, 5 minutes. Season with salt and pepper.
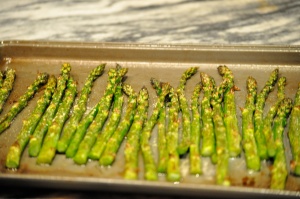
Transfer to bowl. Slice duck and serve with baguette slices, any of your favorite greens (I did mine with Sea Salt Roasted Asparagus …See Recipe below) and pan juices.
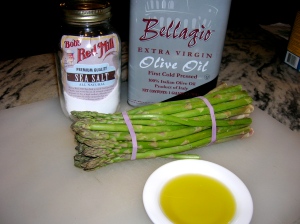
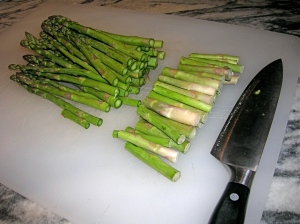
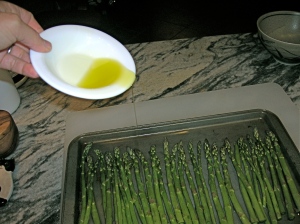
Sea Salt Roasted Asparagus
1 bundle of asparagus (local organic if you can)
A Pinch of Fine Sea Salt
Extra Virgin Olive Oil


